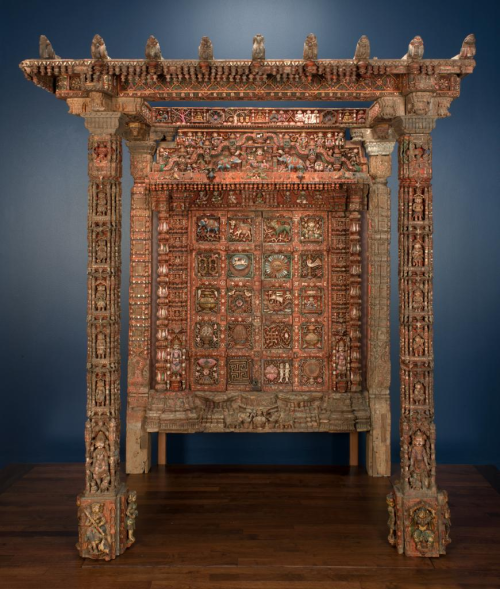
A Jain Shrine
Revealing a hidden treasure: A Jain Shrine From India
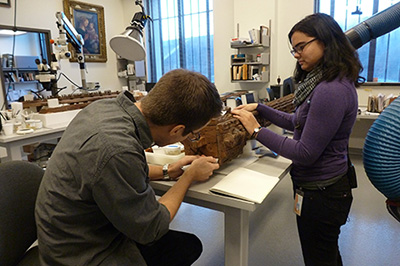
Conservators spent over a year cleaning, conserving and studying the Jain shrine before it could go on exhibition. The Mellon Foundation provided financial support for the examination of the shrine, allowing the materials of the shrine to be studied and dated. Many questions regarding the shrine’s history were able to be answered through this scientific exploration. Take a look at the answers we found below:
How was the shrine cleaned?
First, any flaking paint and varnish was glued back down in place with a glue that does not change the appearance of the paint. Then, the conservators made a custom gel out of three cleaning agents, or solvents, to remove the varnish. Conservators used microscopes to apply the gel to small areas of the shrine. After 10-15 minutes, foam swabs removed the gel and the varnish along with it. Any longer and the paint might dissolve too!
How long did it take to clean the shrine?
Cleaning a 4×4 inch area of the shrine was a good day’s work. Overall, it took over a year for the team to completely clean the shrine.

How old is the shrine?
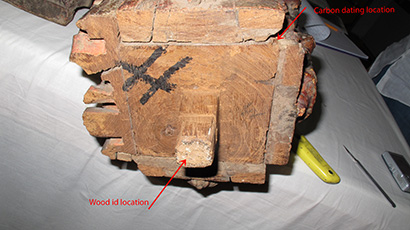
Conservators used radiocarbon 14-dating to determine the age of the shrine. Radioactive carbon 14 is present in all living things, and scientists dated the shrine by measuring the rate of decay of the radioactive carbon 14 in samples from the wood. The results of the testing gave a range of dates. The shrine was made no earlier than 1455 C.E. and no later than about 1635 C.E., making the 16th century the most likely date of the shrine. The scientific evidence is supported by art historical analysis, which suggests that the style of the shrine’s carvings look most like 16th century work.
How was it used?
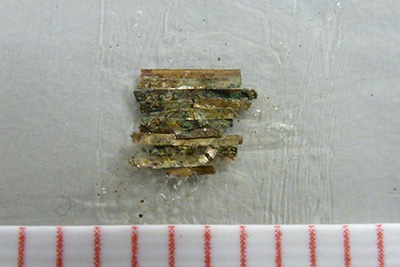
Elaborate domestic shrines, like this one, were constructed by wealthy Jain patrons for use in their private homes. They housed a sculpture of a Jina, likely small in scale and made of metal. Shrines allowed Jains to venerate the image daily, just as they would at a large community temple. While cleaning the shrine, conservators found evidence that the shrine had been adorned with garlands made of gold colored tinsel. Pieces of foil were found still attached to the tops of the columns. The tinsel appeared to be made from bronze, a material no longer used for this purpose, suggesting that the shrine was decorated with garlands a long time ago.
What is It Made Of?
Tests determined that the shrine is made out of teak wood. The paint layers were also analyzed to determine the types of paint used. The original paint layer used many different pigments, including red lead and ultramarine, a blue pigment made from ground lapis lazuli. Lapis Lazuli is imported primarily from Afghanistan, so it was very expensive to obtain. Its presence on the shrine suggests that this was an important commission. The shrine was repainted in the 19th century, and the pigments used include: a red lead ground with emerald green, lead white, orpiment yellow, indigo blue, purple pin dyes and a mix of red lead and cinnabar. Other materials were also used on the shrine, such as glass inserts, mirrored glass and gold leaf.
How was it made?
Over 20 pieces of carved teak wood were pegged together with mortise and tenons, wood dowels, and hand-made nails. It was then painted after it was assembled. Some elements were repaired and reattached at various periods of the shrine’s history. Later restorations were done with modern, machine made screws.
Indian, 16th century. Wood, glass, polychrome paint and gold leaf, 80 3/4 × 71 1/2 × 51 inches. Purchase: William Rockhill Nelson Trust. 32-136.1-21
Chinese Wall Photography Reveals Ancient Secrets
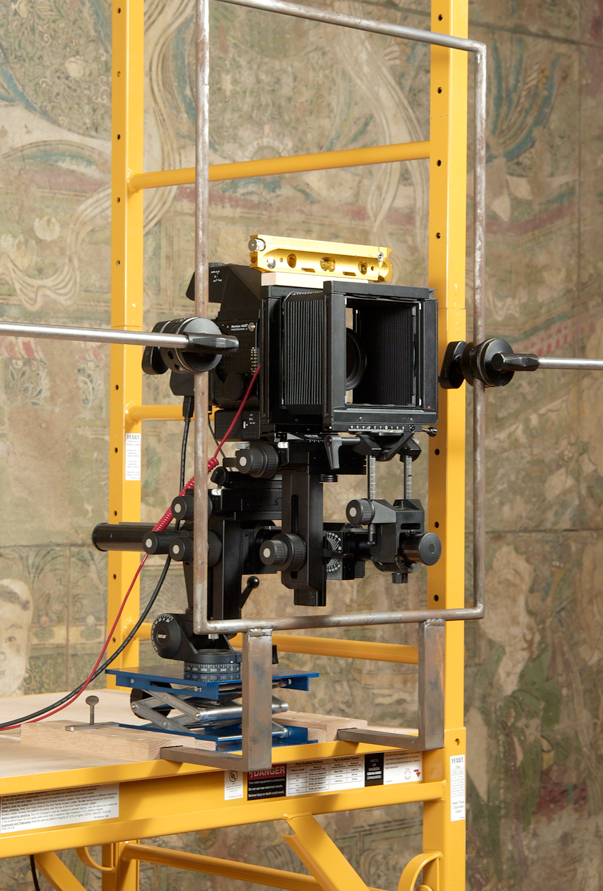
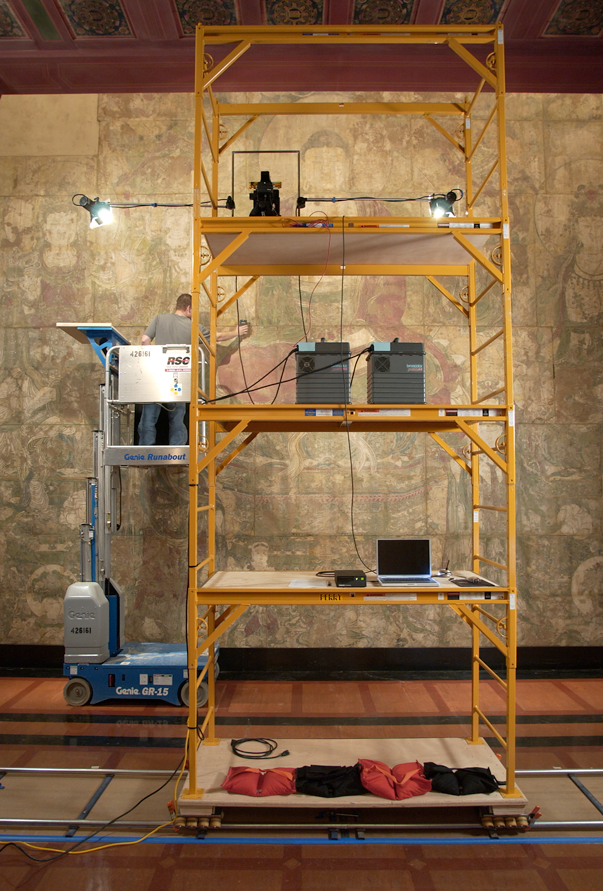
The Nelson-Atkins conservators and photographers completed a survey of the Museum’s monumental Chinese wall painting, The Assembly of Tejaprabha (32-91/1). The columns and other gallery architecture had previously made it impossible to photograph the entire wall in one shot.
The solution came in the use of digital photography. With funding from the Getty Grant Foundation, Museum photographers digitally photographed every inch of the mural’s surface.
These accurate, high resolution images will ensure a more precise way to monitor any changes in the wall’s condition over time. They will be used by conservators, as well as scholars worldwide.
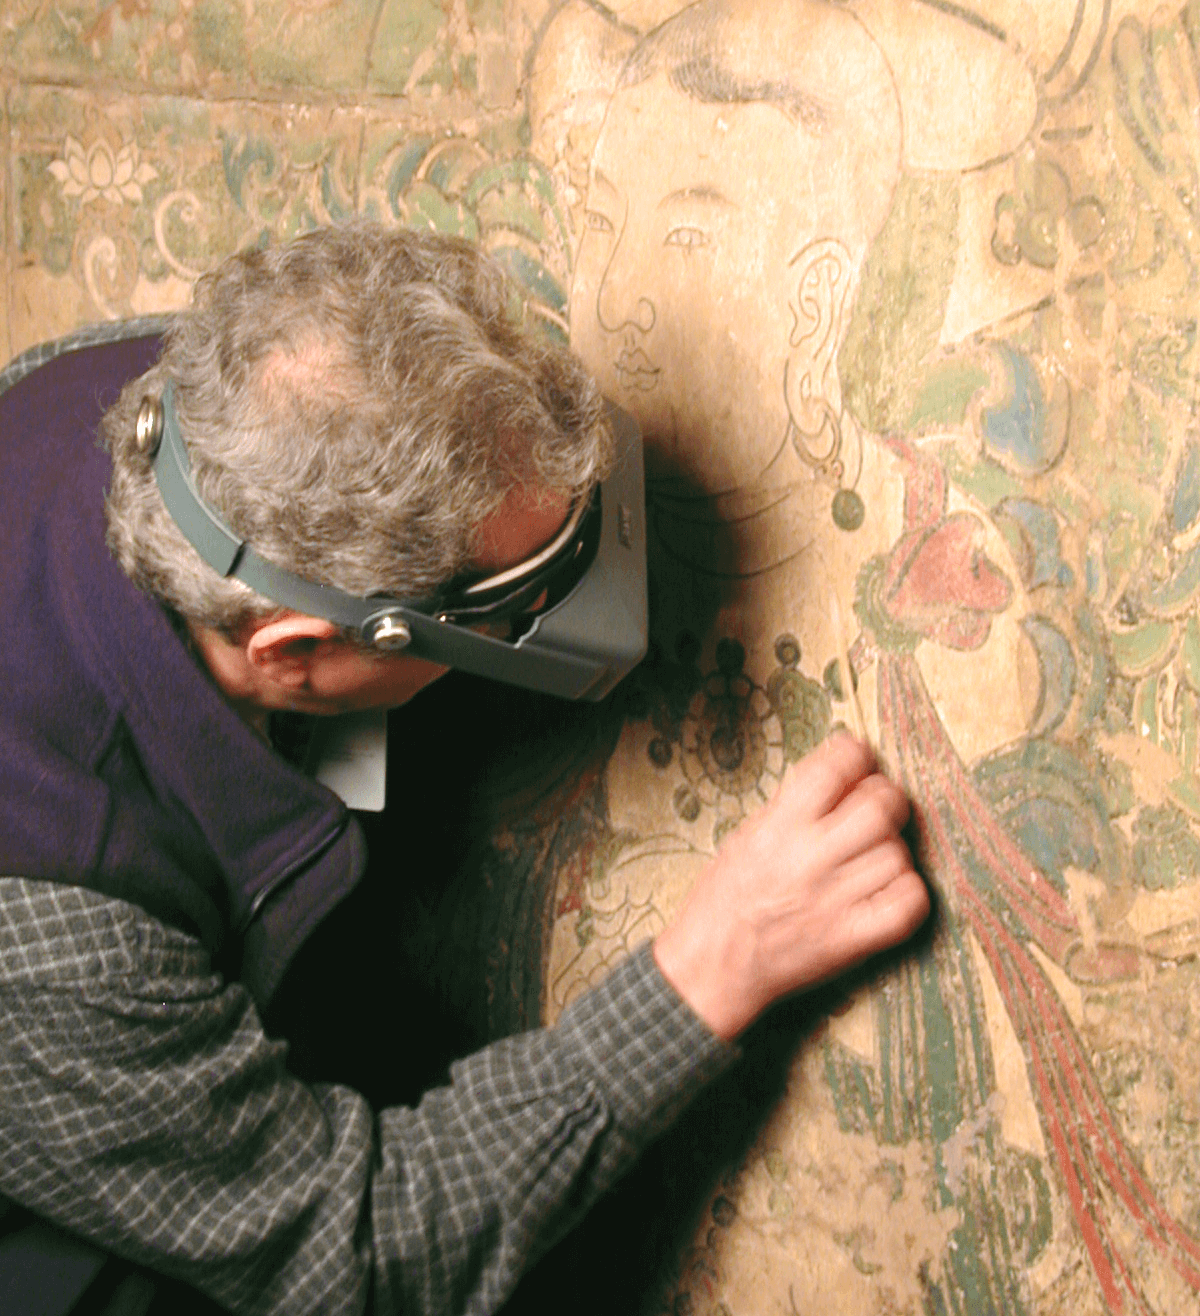
Once all the sections were photographed and stitched together, Museum conservators analyzed the entire surface for its condition. Such findings as exposed clay, fill material, old restorations, cracks, flaking and metal supports were individually noted.
Measuring over 23-feet high and 48-feet wide, the Museum’s monumental Chinese wall painting, Paradise of Tejraprabha Buddha, is one of the few surviving examples from the Yuan Dynasty (1279-1368), a period of great accomplishment for Chinese mural painting.
The wall was made in one piece for the temple, but it was cut into 47 sections to ship the painting out of China. The Nelson-Atkins acquired the mural in 1932. The 47 pieces were strengthened with plaster and steel before it was attached to the Museum’s wall in 1933.
Originally, this painting was the center of spiritual rituals in a Buddhist monastery in Shanxi province called the Monastery of Expansive Victory.
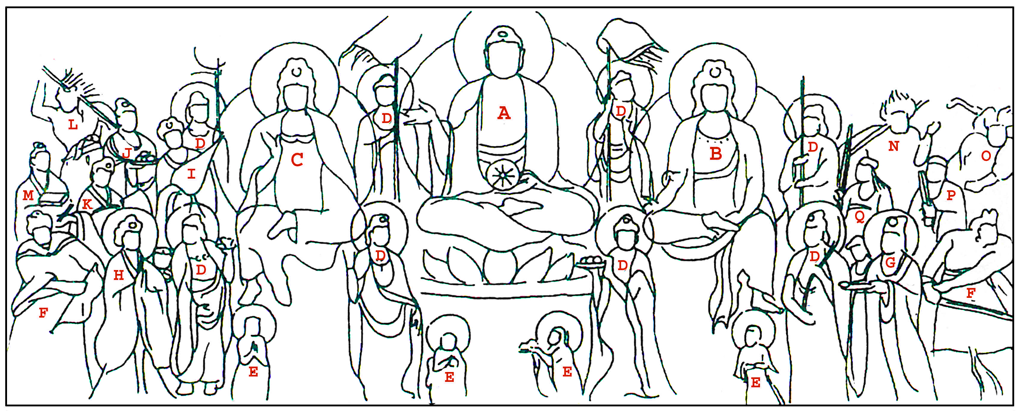
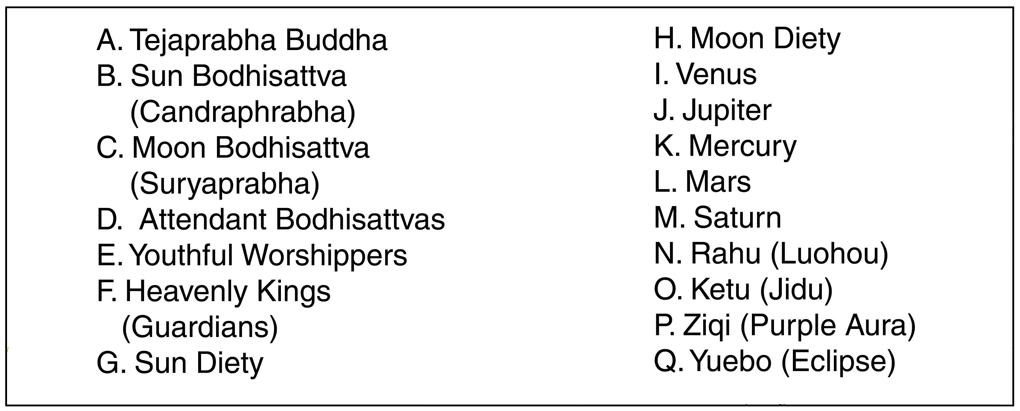
In the mural, Buddha is surrounded by a group of attendants. In the center of the wall is Tejraprabha, whose name literally means “blazing light.” This Buddha’s spiritual enlightenment becomes more impressive when we realize that the figures surrounding him represent celestial bodies, including the sun, moon and five planets of traditional Chinese astronomy.
Bright colors dominate the center of the mural, with dark colors used extensively around the outer edges. The artists purposefully painted in this manner to create the illusion that the entire assembly is illuminated by light radiating from the central Buddha.
The Assembly of Tejaprabha, China, Yuan Dynasty (1279-1368), early 14th century, Ink and mineral colors on clay. Purchase: William Rockhill Nelson Trust, 32-91/1
Stonehenge Infrared Reflectography and Artist Technique
Pouncing is a technique used to transfer a drawing on paper onto another surface to serve as a guide for a painting. Tiny holes are pricked into the paper along the drawn lines and then the paper is placed over a prepared surface (usually panel, canvas or fresco). The pricked drawing is rubbed with charcoal, leaving dotted lines that transfer the drawing to the surface below.1 As the artist progresses with the painting, the pounced lines are usually covered by paint and become invisible to the viewer.
However, conservators can use infrared reflectography (IRR) to determine what lies beneath the paint. IRR is a non-destructive examination method that detects carbon-based materials such as graphite, charcoal and ink. Because these materials are often used to create a preliminary sketch for a painting, IRR is effective in the study of underdrawings. With this technique, infrared radiation (IR) passes through the paint and interacts with the underdrawing. These interactions are captured with an IR-sensitive camera, revealing fascinating information about an artist’s technique, including changes to the composition.
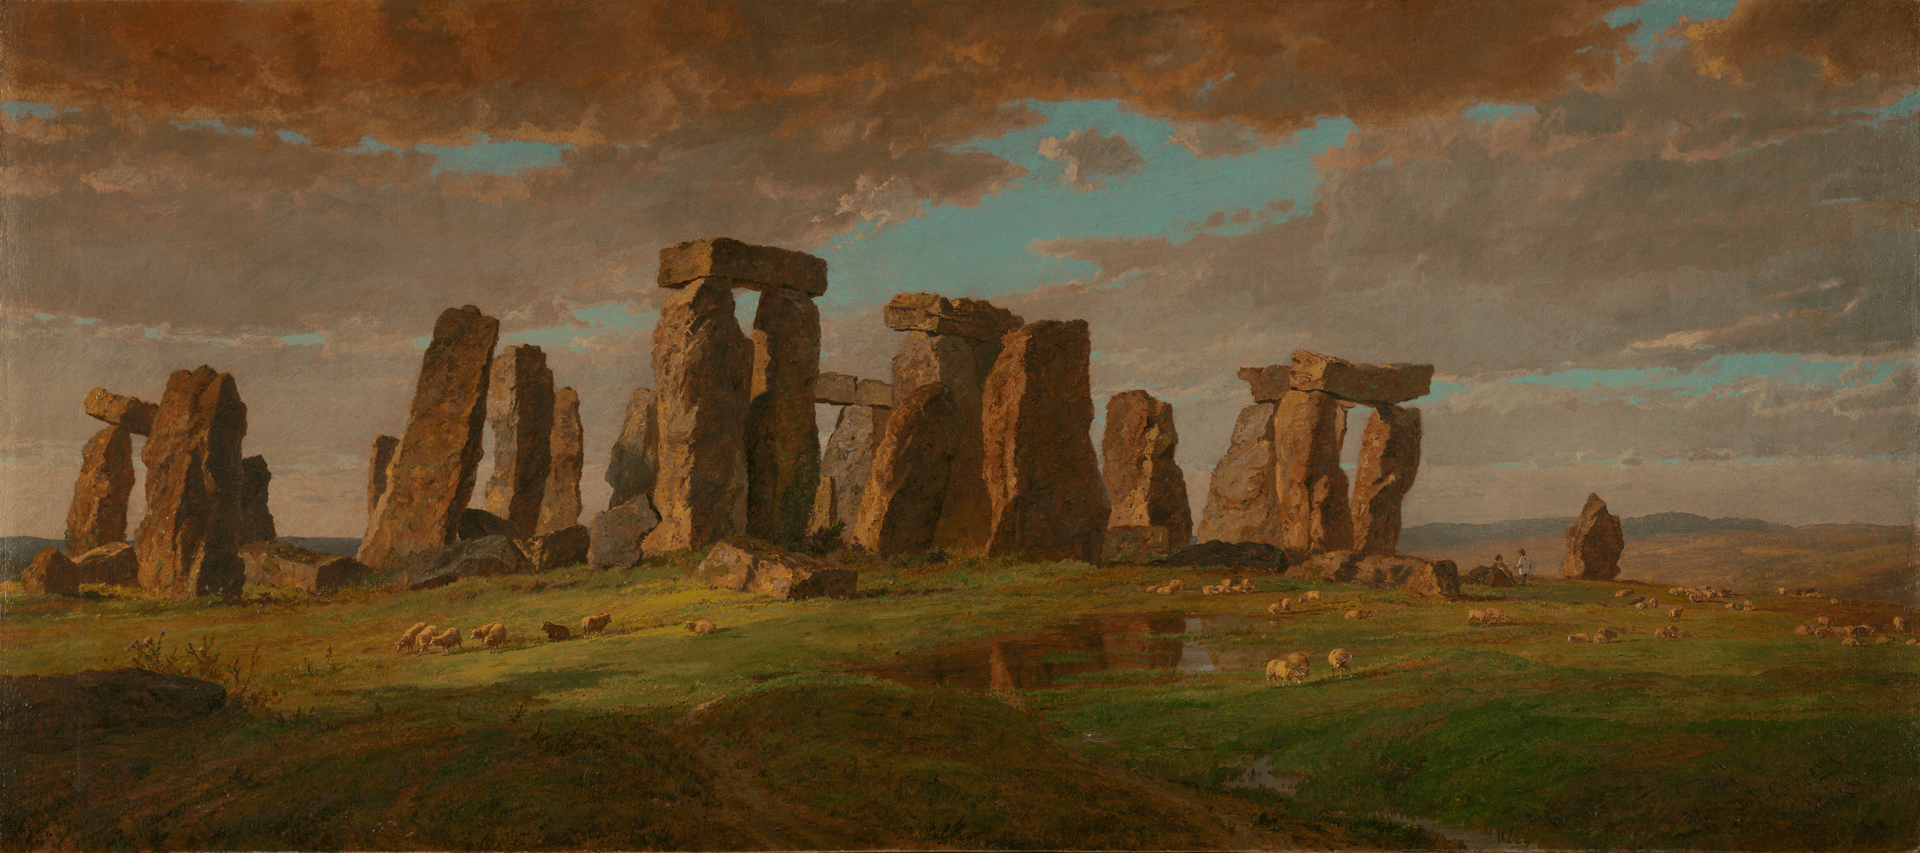
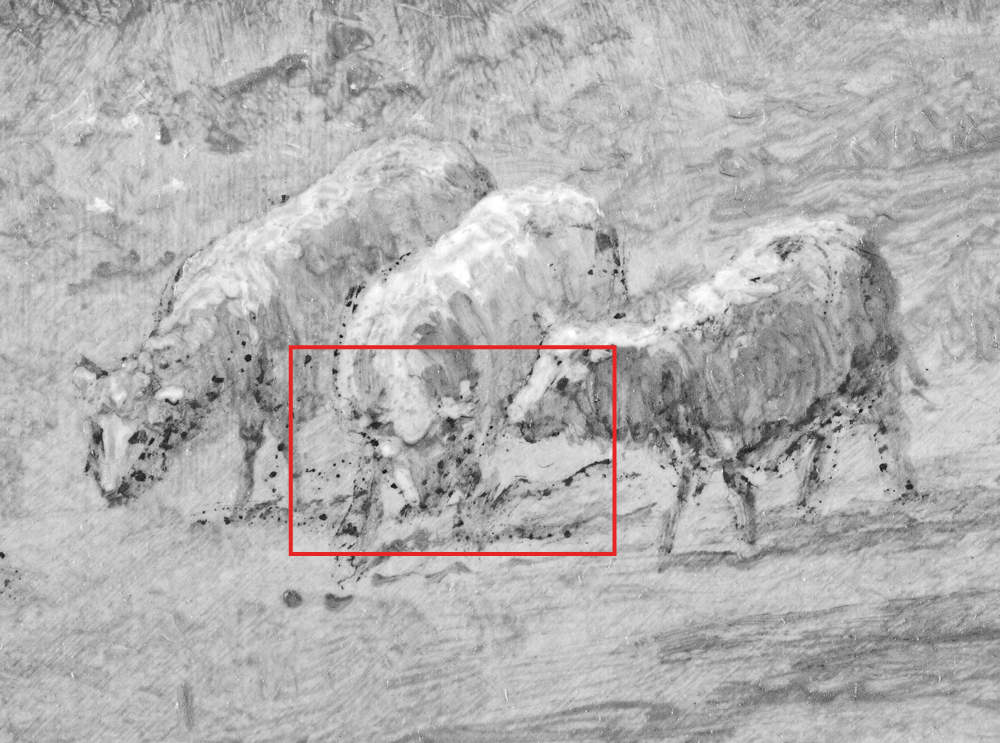
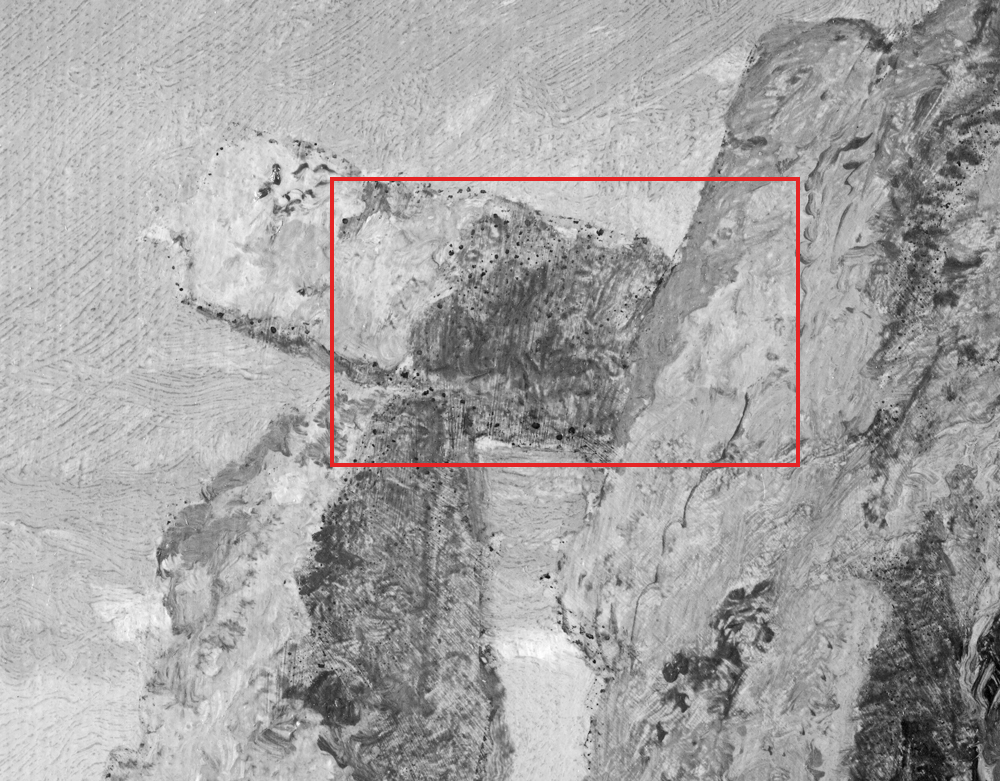
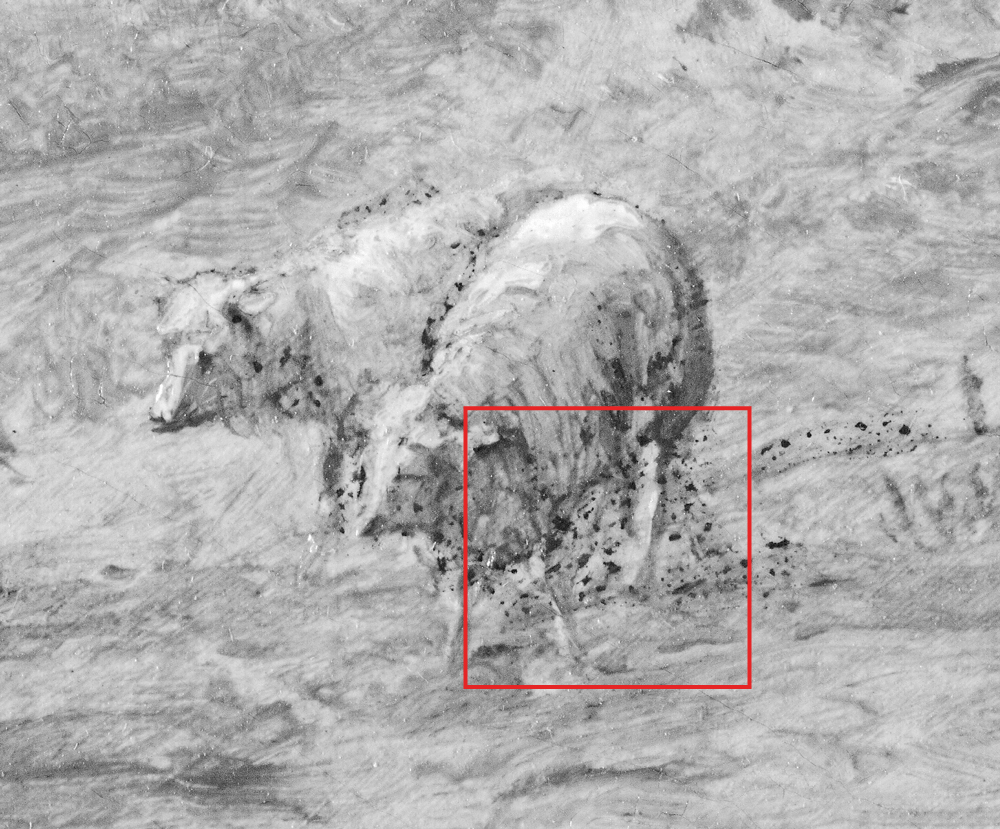
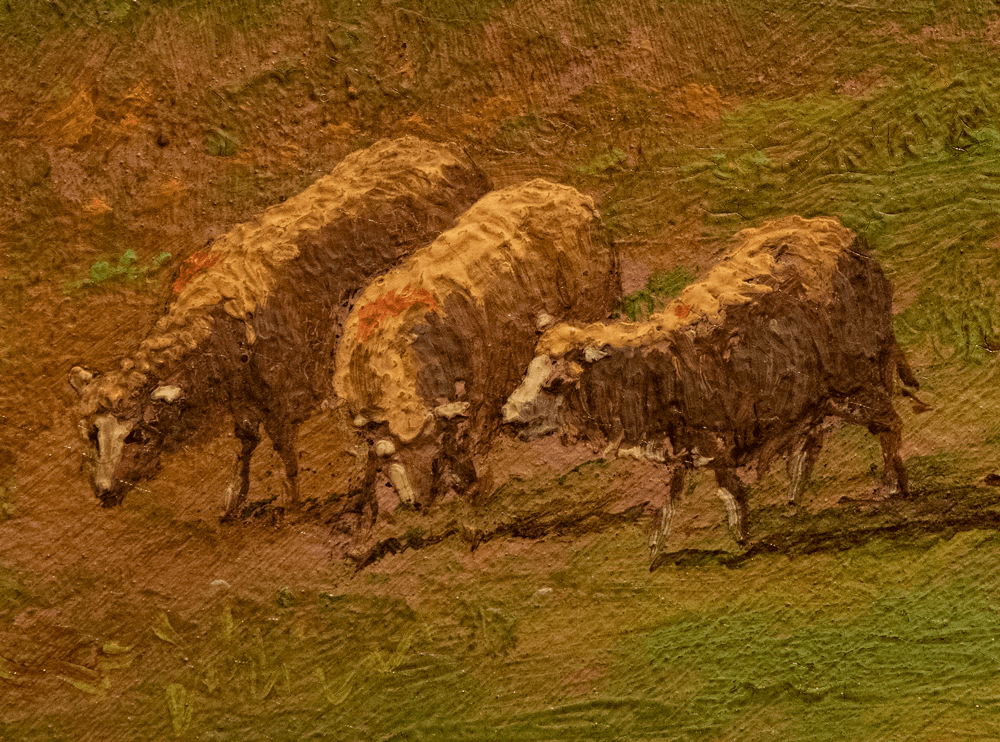
Stonehenge, by Jasper Cropsey, was painted in 1876 and features the site’s great monoliths bathed in glowing light and surrounded by small grazing sheep. When this painting is studied with IRR, pounced dots are evident. Dark pinhole-size dots outline the stone structures, shadows, sheep and even a few foreground details.
Although the use of pouncing is unusual for a landscape of this period and no pricked drawings of Stonehenge have been found, Cropsey may have turned to this technique for a couple of reasons. Pouncing was a means of transferring drawings for large murals, something the artist would do himself not long after he finished Stonehenge.2 Perhaps, also, the artist found a transfer method beneficial for a painting that was based on drawings created almost thirty years earlier.
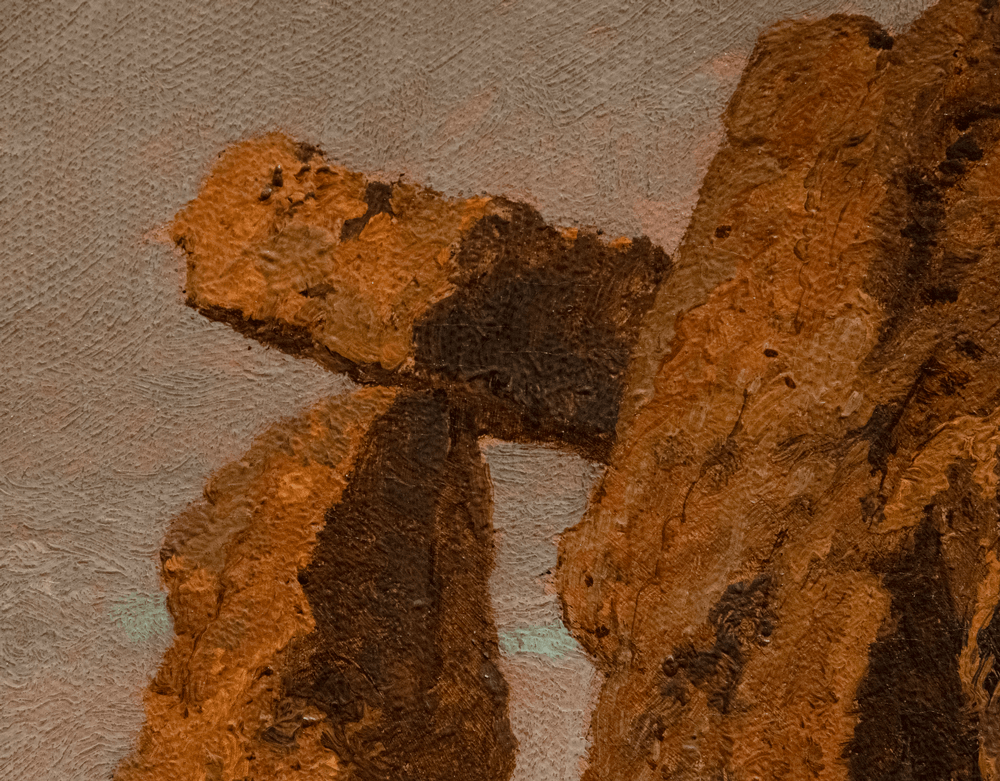
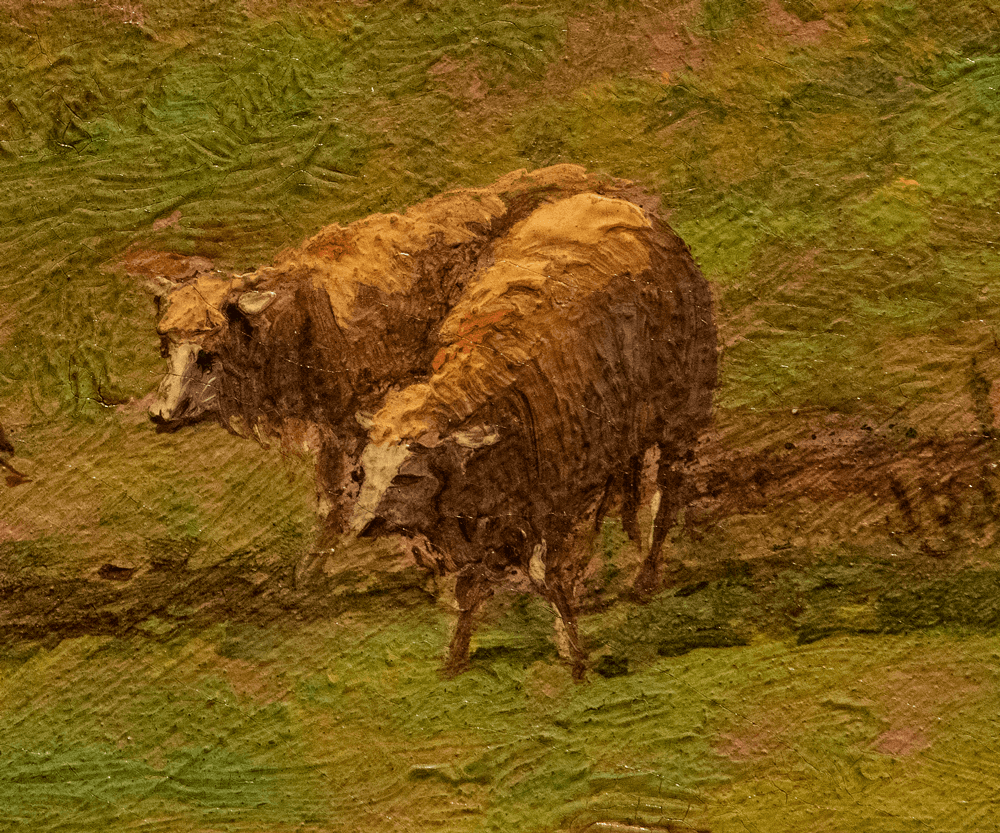
DETAIL IMAGES, NORMAL LIGHTING CONDITIONS
DETAIL IMAGES CAPTURED WITH AN IR-MODIFIED CAMERA